Vegan, gluten-free brownie ice cream sundae

So, I think it’s pretty clear from the rest of my posts that I am neither vegan nor gluten-free. However, I consider these types of cooking a challenge – because everything IS better with butter, let’s be real – and I like a challenge. Plus, I feel like I should have recipes in my back pocket for when I’m entertaining someone with different dietary needs. Or, for when I have too many regular brownies and need to pull myself together.

This actually came together randomly – Dixi was over for a pizza and movie night, and I happened to have the brownies on hand already. I was going to pull them out, realized I had coconut milk in the fridge and bananas in the freezer, and thought “sundaes!” Because what goes better with horror movies and hot tubs?
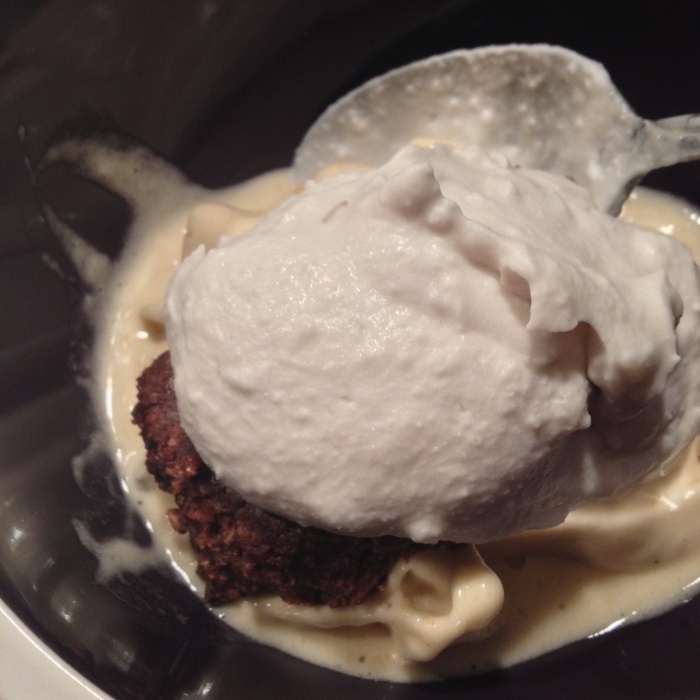
Vegan Brownie Sundae
It’s not the same as a banana split, but this vegan brownie sundae is a great treat for a hot summer day. Or any day, really.

A note about this overall: it’s obviously not as sweet as an actual sundae would be. That may or may not be your speed, but don’t go in expecting a replica – this is not a substitute, it’s more like a riff. I have a lot of other notes below in the ingredients and the instructions – don’t let that scare you. As long as you have a food processor/blender, everything in this recipe is fairly simple.

You’ll need:

“Brownies:” (barely adapted from this Food 52 recipe)

  • c chopped pecans (even better if they’re toasted)
  • c pitted dates (seriously, spend the money and buy the pre-pitted ones. Pitting them yourself is horrible – you’re forced to realize exactly how much they look like cockroaches. And it’s sticky and messy – not worth it, I promise.)
  • 2 T coconut oil (I omitted this originally, and you can, but it helps give a more ‘fudgy’ texture.)
  • 1/3 c nut butter (I used peanut butter – but honestly, you’re basically making pecan butter out of the pecans, so you could just throw in extra of those, if you like.)
  • 1/4 c unsweetened shredded coconut (You will have to go to a health food store or order this online. You can sub in sweetened if you like, but the unsweetened is nice on a lot of other things.)
  • 1 t vanilla (I know this may sound a little snobby, but good, quality, real vanilla is SUPER important in this recipe. You’re not cooking anything, so you really need the ingredients to be the best you can afford.)
  • 2+ T unsweetened cocoa powder (See quality note above. Also, I probably added more like 3. The dates are pretty sweet, so if you like a little bitter in your sweets, don’t be afraid to up this a bit.)
  • 1 T maple syrup (this is to taste – you may want as much as double.)
  • Dash of salt

“Ice cream:”

4 frozen bananas (Peel, chop and place in freezer bag for at least 4 hours – these take a lot longer to freeze if you leave them whole. Also, don’t do what I did and leave the skins on, it’s a pain.)

“Whipped cream:”

  • 1 can full-fat coconut milk, refrigerated at least 2 hours
  • 1 T vanilla
  • Sweetener to taste (I didn’t think it needed any, but you may want to add maple syrup or a little sugar.)

Get cooking:

Brownies

  1. Pulse pecans in a food processor until smooth, like peanut butter. Add dates and pulse to mix.
  2. Add other ingredients and mix until smooth. Taste to make sure the sweetness level is where you want it.
  3. Line an 8×8 pan with wax or parchment, press mixture into pan until flat (ish – it doesn’t have to be perfect.)
  4. Freeze for 30 minutes-1 hour.
  5. Slice and serve! They keep well for about a week in the fridge or the freezer, separated by wax paper.

Ice cream

  1. Add bananas to food processor or blender. Pulse until broken up, then blend until smooth.
  2. (It’s really important to do this right before you make the sundaes – once the bananas melt, they go from ice cream consistency to banana mush.)

Whipped cream

  1. Scoop solid part of coconut milk off the top of the can. Beat with vanilla and sweetener until smooth.
  2. Layer it up like your favorite sundae and go to town! You may want to break the brownies up over top of the banana, instead of serving underneath.
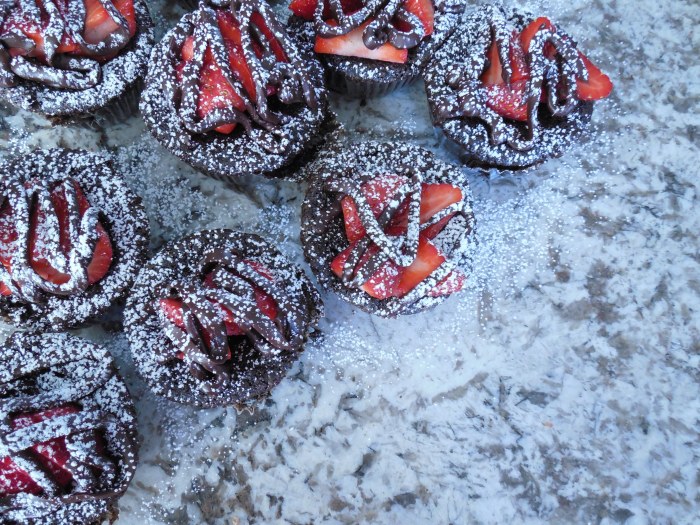
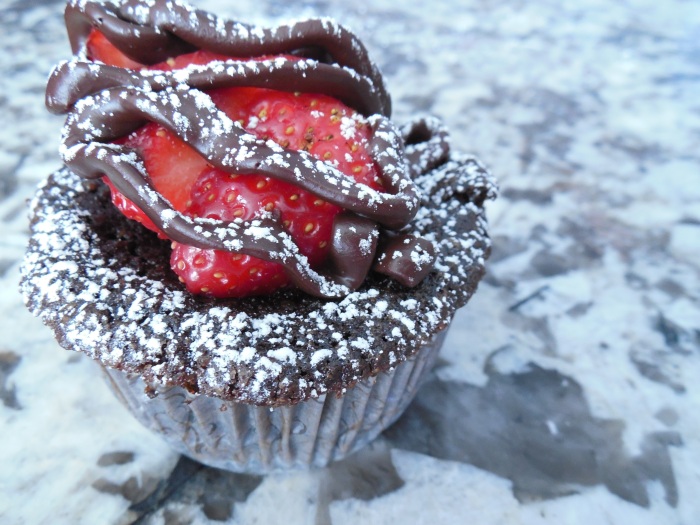
Chocolate covered strawberry cupcakes: gluten-free, lactose-free

There are a few inalienable rights in my world: the right to chasing your own happy. The right to surround yourself with only those who help you chase that happy. And the right to cupcakes, always. I’m especially delighted my friends Merrill and Mike found each other to chase their happy together. But, the fact that they’re gluten and lactose-free sometimes interferes with the cupcakes part. Well, no more. Special people deserve special treats, and these cupcakes are treat to see and eat.

Chocolate covered strawberry cupcake
Who knew gluten-free and lactose-free could look this good?

This cupcake has three layers – the crust, the cupcake and the top. Don’t let that scare you, it’s not super involved as desserts go. The layering makes it look WAY fancier relative to the amount of time/effort it actually takes to make. The cupcake layer is naturally gluten-free, and the secret ingredient is quinoa. For the dairy, I used a form of lactose-free milk that’s relatively new to the market called Fairlife. It tastes like normal milk, but is filtered to have more protein, more calcium, less sugar…and no lactose. Because … science.

For the crust, you could use half the amount written and still have a good layer – but everyone loved the thick crust. You could also omit altogether and double the cake recipe (you’d get more than 12 cupcakes, I think.) The topping helps, because the cupcakes will cave in – and obviously, you should fill them with something tasty. For true dairy-free cupcakes, you can sub the chocolate chips with a vegan variety.

Chocolate covered strawberry cupcakes
Yes, I ate this one as a taste test, and no, I’m not ashamed about it.

One more note – normally, you only fill cupcakes 2/3 – 3/4 full. And normally, I ignore this. In this case, I should not have – because the tops dome and collapse, they can be a little hard to get out of the pan (even with the liners.)

You’ll need:

Cupcake layer (from Mel’s Kitchen Cafe):

  • 1 c cooked and cooled quinoa (cook in water)
  • 1/4 c milk
  • 2 eggs
  • 1 teaspoon pure vanilla extract
  • 6 T butter, melted and cooled
  • 3/4 c sugar
  • 1/2 c cocoa powder
  • 3/4 t baking powder
  • 1/4 t baking soda
  • Dash of salt
Crust layer:
  • 2 c chocolate sandwich cookies (Gluten free, if desired), crushed
  • 5 T butter, melted
Topping:
  • 1 1/2 c chocolate chips
  • 1/3 c milk (Lactose free, if desired)
  • 12 strawberries
  • Powdered sugar for dusting

Get cooking:

Crust layer:

  1. Preheat over to 350 degrees.
  2. Line cupcake pan with cupcake liners, spray with coking spray.
  3. Combine cookies and butter, press firmly into each cupcake liner.

Cupcake layer:

  1. Blend milk, eggs and vailla in food prosessr. Add quinoa and butter, blend until smooth.
  2. Mix dry ingredients in bowl, add wet and mix until combined. Pour on top of crust layer.
  3. Bake 20-25 minutes, until toothpick comes out of cupcakes clean (it will still be wet – this is ok, it just shouldn’t have brown batter on it.)
  4. Let cool completely and dust with powdered sugar.

Topping layer:

  1. Melt choclate chips in microwave, using 30-secnd blasts and stirring after each.
  2. Add milk and whisk vigourously until combined and gliossy.
  3. Pour/scrape mixture into small plastic sandwich bag, cut ff small corner.
  4. Hull strawberries, cut them into slices or leave whole (your call). Place in the middle of cooled cupcakes.
  5. Drizzle chocolate mix over cupcakes. Let it cool and harden compleelty.

Brazilian Shrimp Soup

I love to entertain – except for those nights. Nights when you don’t want to clean. Nights after a wretched day. Those nights when you just want to cook something soul-warming, put on your PJs, open a bottle of wine – and call your best friends. Because you’re scared of them seeing your house. Even on those awful nights, Merrill will still come over – in her PJs, homework and Oscar (her dog) in tow. My house can be a mess, I usually am a mess – but we make some room on the couch to eat, laugh and relax. She requested this recipe during a ‘couch date’ – but, as always, we fiddled a bit. It seems like a lot of ingredients, but you’ll probably have most laying around already.

Brazilian Shrimp Soup
The perfect classed-up comfort food – Brazilian shrimp soup.


Based on:

http://www.foodandwine.com/recipes/brazilian-shrimp-soup


You’ll need:

  • 1 T olive oil
  • 1 onion, chopped
  • 1 bell pepper, chopped
  • 6 cloves garlic, minced
  • 1 t fresh ginger, minced
  • 1 cup long-grain rice
  • 1/2 t red-pepper flakes
  • 1 28 oz can crushed tomatoes
  • 2 cups water
  • 2 cans light coconut milk
  • 2 lbs medium shrimp, shelled and cut in half horizontally
  • 1 T curry powder
  • 1 1/2 t cajun seasoning
  • ½ t cinnamon
  • Juice of 1 lemon
  • 1/2 cup chopped fresh parsley or cilantro
  • Salt, pepper, sriracha to taste

Get cooking:

  1. In a large pot, heat the oil over moderately low heat. Add the onion, bell pepper, and garlic stirring occasionally, until the vegetables start to soften (about 10 minutes.)
  2. Add the rice, red pepper flakes, salt, tomatoes, and water to the pot. Bring to a boil and cook until the rice is almost tender, about 10 minutes.
  3. Stir the coconut milk into the soup. Bring back to a simmer and then stir in the shrimp. Simmer, stirring occasionally, until the shrimp are just done, 3 to 5 minutes. erve in large bowls garnished with lemons, sriracha and parsley.